How to design a stamp for free?
Have you ever wanted to design a stamp without spending a dime? Whether it’s for your small business, a creative project, or a personalized touch on invitations or packaging, learning how to design a stamp for free is easier than you might think. With today’s free online tools and resources, anyone can create a custom stamp that looks professional — no graphic design experience needed. In this guide, we’ll walk you through the simple steps to bring your stamp ideas to life without breaking the bank.
Step 1: Decide the Purpose and Style of Your Stamp
Before you dive into design tools, consider what your stamp will be used for. E.g.:
➡️ Business branding (e.g., logo, address)
➡️ Event invites (e.g., weddings, parties)
➡️ Personal crafting (e.g., journals, scrapbooks)
Also, decide on a style – minimalist, vintage, illustrative, or typographic? This will help guide your design decisions.
Step 2: Choose a Free Design Tool
While there are many stamp design tools available online, most of them charge users for access to advanced features or downloads. Additionally, professional graphic design software like Adobe Photoshop or CorelDRAW can be expensive and come with a steep learning curve, especially for beginners.
👉 That’s why we recommend using our 100% free stamp generator.
Our tool is designed specifically for creating stamp designs quickly and easily — no graphic design experience required. You can:
➡️ Choose from ready-made templates
➡️ Export your stamp as a PNG file for digital use
➡️ Download vector files (SVG/PDF) for professional stamp production
Unlike other platforms, our generator doesn’t limit your creativity or charge for downloads—it’s completely free to use.
Step 3: Create Your Design
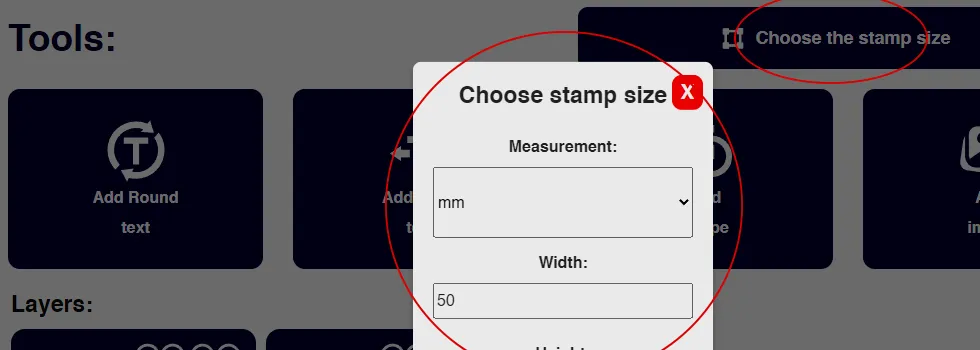
1️⃣ Set Your Canvas Size
Our stamp maker offers a convenient option to set your canvas size in millimeters (mm) or inches (in), giving you flexibility and accuracy for real-world applications. You need to read the product description of a self-inking stamp to find the size you will enter into our online tool (e.g., 60x40mm or 1.5×1.5 inches). The most common stamp brands to look for are Trodat, Shiny, Colop, ExcelMark, MaxStamp, and Xstamper.
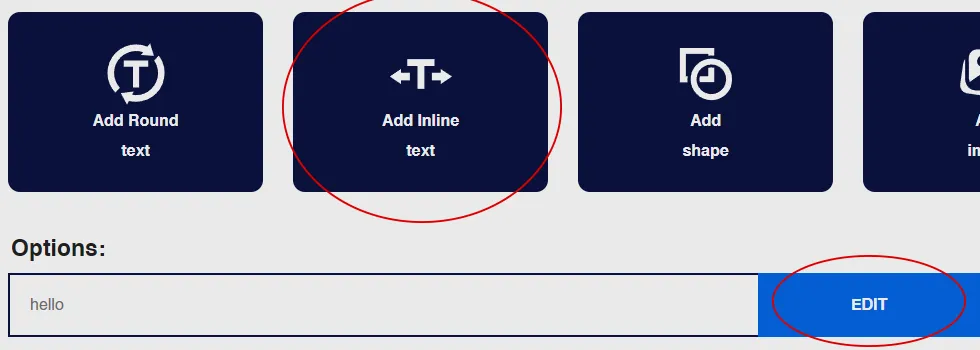
2️⃣ Insert Text
Click on “Add Round Text” or “Add Inline Text” to insert content such as company name, location, organization details, names, dates, or notices. If you need to add two lines of text, simply click the corresponding button twice. Both options offer a variety of customization features, including font family, font size, style, color, spacing, and radius adjustments.
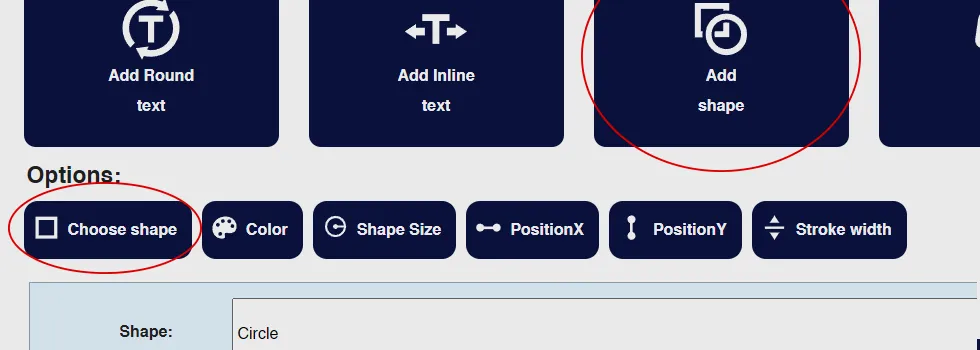
3️⃣ Add Borders
Use a border to give your design that authentic “stamp” look. You can choose from a variety of shapes, including circle, rectangle, oval, square, pentagon, hexagon, and more, depending on your design preference or the shape of your physical stamp. To enhance the stamp effect, you can also add a serrated edge by using dotted lines or pre-made stamp edge shapes. These features help mimic the look of traditional rubber stamps and give your design a polished, professional appearance.
4️⃣ Add Icons, Logo, or Graphics
To make your stamp stand out, consider adding your company logo, brand image, or a relevant illustration. We strongly recommend using vector format graphics for the best print quality and scalability. If you’re designing a digital-only stamp, using raster images is acceptable—but for physical stamps, vectors are ideal. You can find a wide selection of high-quality vector icons for your stamp design at https://www.svgrepo.com.
Step 4: Export Your Design
Once your design is ready:
➕ Save it as a PNG or SVG file.
➕ Make sure to keep the background transparent if you plan to print or overlay it on other materials.
➕ For physical stamps, high-contrast black and white designs work best.
Step 5: Use or Print Your Stamp
You have several free or affordable options for using your stamp design:
⭐ Digital Use: Add your stamp to emails, invoices, business documents, or social media posts to give them a personalized touch.
⭐ Print at Home: Print the design on sticker paper, envelopes, packaging, or labels for handmade or professional use.
⭐ Create a Physical Stamp: Find a reliable stamp supplier online and upload the design you created using our free stamp generator. Many platforms offer affordable pricing and quick delivery.
Advice for Future Stamp Makers
If you’ve recently purchased a laser engraving machine and are planning to start your own stamp-making business, you’re already on the right track. One of the biggest challenges in this industry is handling custom design requests efficiently—especially if you’re spending too much time manually editing or creating designs for each customer.
That’s where our Free Stamp Generator comes in. By integrating this tool into your business workflow, you can offer your customers an easy way to create their own unique stamp designs directly on your website or through a shared link.
This means you can save hours of design time, eliminate back-and-forth communication, and focus your energy where it matters—engraving and fulfilling more orders. It’s a smart, scalable solution for anyone serious about growing their custom stamp business.
Final Thoughts
Designing a custom stamp doesn’t require expensive software or professional skills. With the right tools and a bit of inspiration, you can create something uniquely yours—for free. So get started, and give your ideas a stamp of approval!